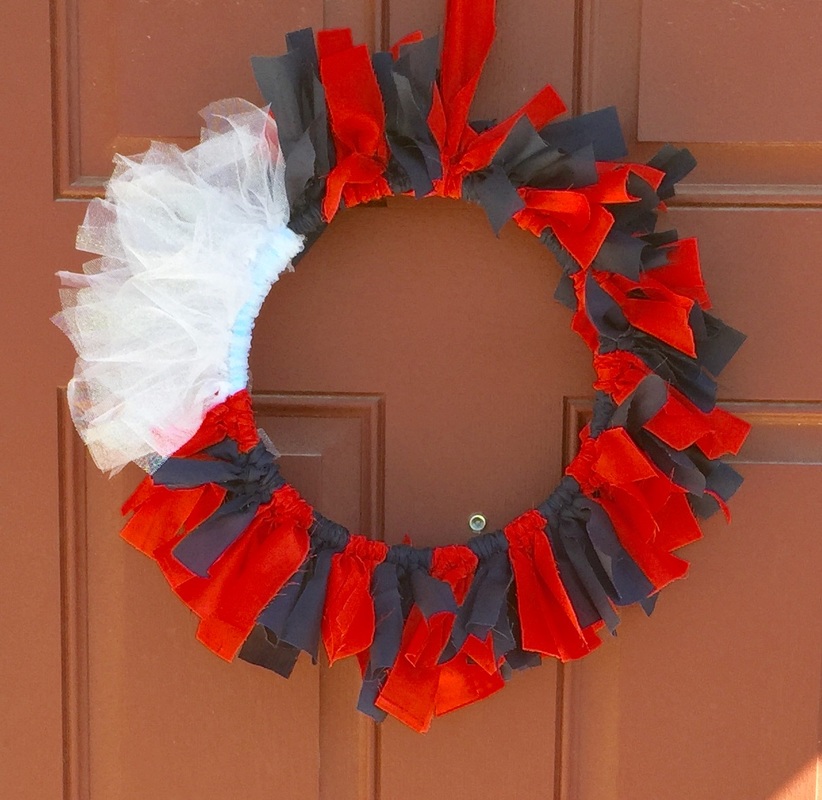
Fourth of July Wreath
Fourth of July is almost here - one of our favorite holidays! But before its time for the BBQ's and fireworks, we get to decorate our houses in red, white, & blue :)
Here are the directions for a super cute Fourth of July wreath.
Time: 2 hours
Price: Materials cost me about $20, but you can make it cheaper. I had alot of leftover material.
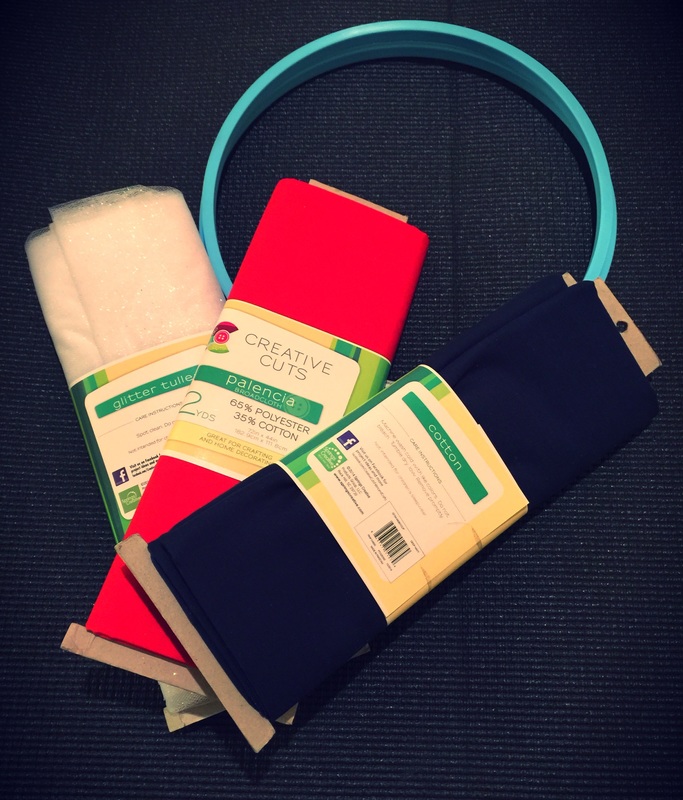
Supplies:
- Red, white, and blue cloth material. I chose to use cotton & tulle. You can use whatever material you want - denim would look really cute for blue.
- Hoop/circle, I used a plastic needlework hoop. You could use other supplies, even a wire hanger.
- Scissors
Here are the directions for a super cute Fourth of July wreath.
Time: 2 hours
Price: Materials cost me about $20, but you can make it cheaper. I had alot of leftover material.
Supplies:
- Red, white, and blue cloth material. I chose to use cotton & tulle. You can use whatever material you want - denim would look really cute for blue.
- Hoop/circle, I used a plastic needlework hoop. You could use other supplies, even a wire hanger.
- Scissors
Step 1: Cut strips of material into 11in x 1.5 in pieces
Step 2: Tie strip to hoop and double knot it. For the red and blue, I did 4 in a row and switched colors. The great thing about this craft is that it can be done anyway you want, you don't have to do it exactly how I did.
Step 2: Tie strip to hoop and double knot it. For the red and blue, I did 4 in a row and switched colors. The great thing about this craft is that it can be done anyway you want, you don't have to do it exactly how I did.
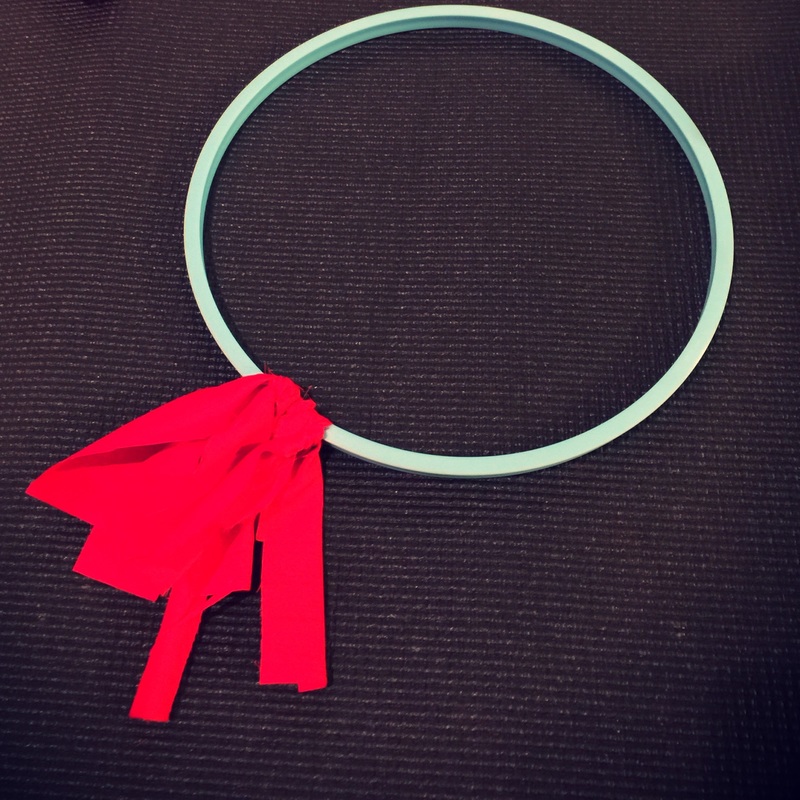
Step 3: Tie a long piece of material to the top of the hoop so that you can hang
Sincerely,
Jean
Jean
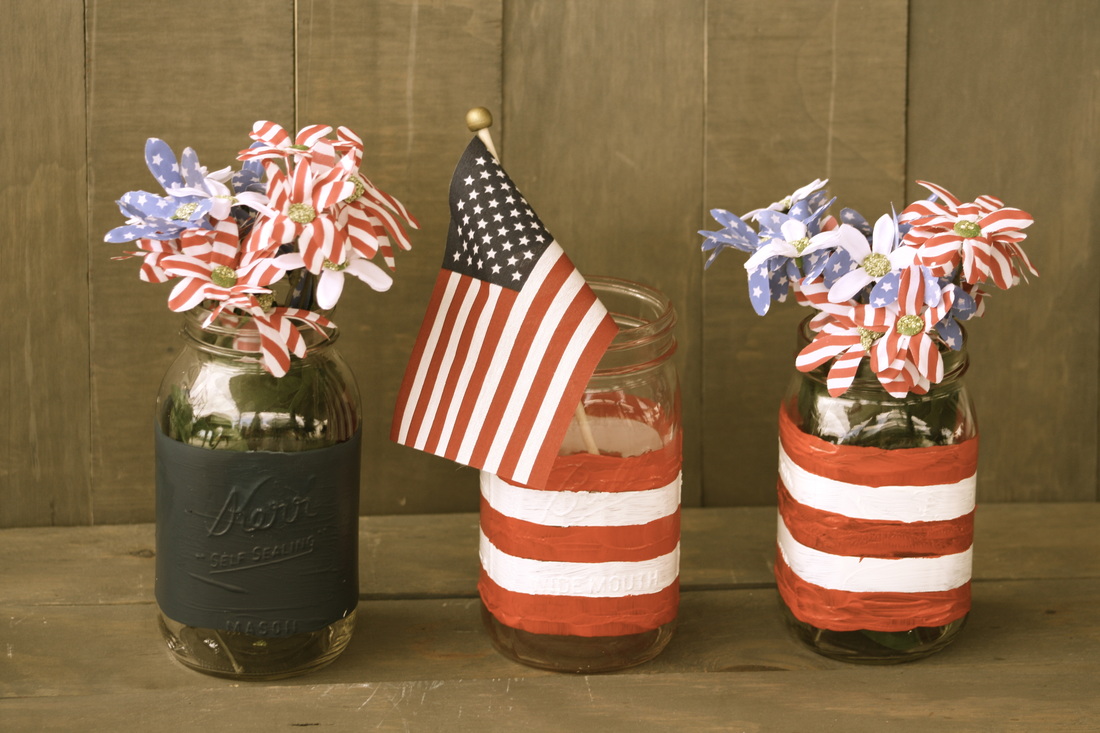
Patriotic Mason Jar Craft
The 4th of July is almost here and it is one of our favorite holidays! It is filled with BBQs, sunshine, swimming, fireworks, and being surrounded by fellow proud Americans. There's also a few other patriotic holidays coming up soon as well, Memorial Day (May 25) and Flag Day (June 14).
Here is a cute patriotic craft that you can display from May to July :)
What you will need:
1. Red, White, and Blue Acrylic paint
2. Paint brush
3. Small flag, plastic flowers
4. Electrical tape
6. 3 Mason Jars
Here is a cute patriotic craft that you can display from May to July :)
What you will need:
1. Red, White, and Blue Acrylic paint
2. Paint brush
3. Small flag, plastic flowers
4. Electrical tape
6. 3 Mason Jars
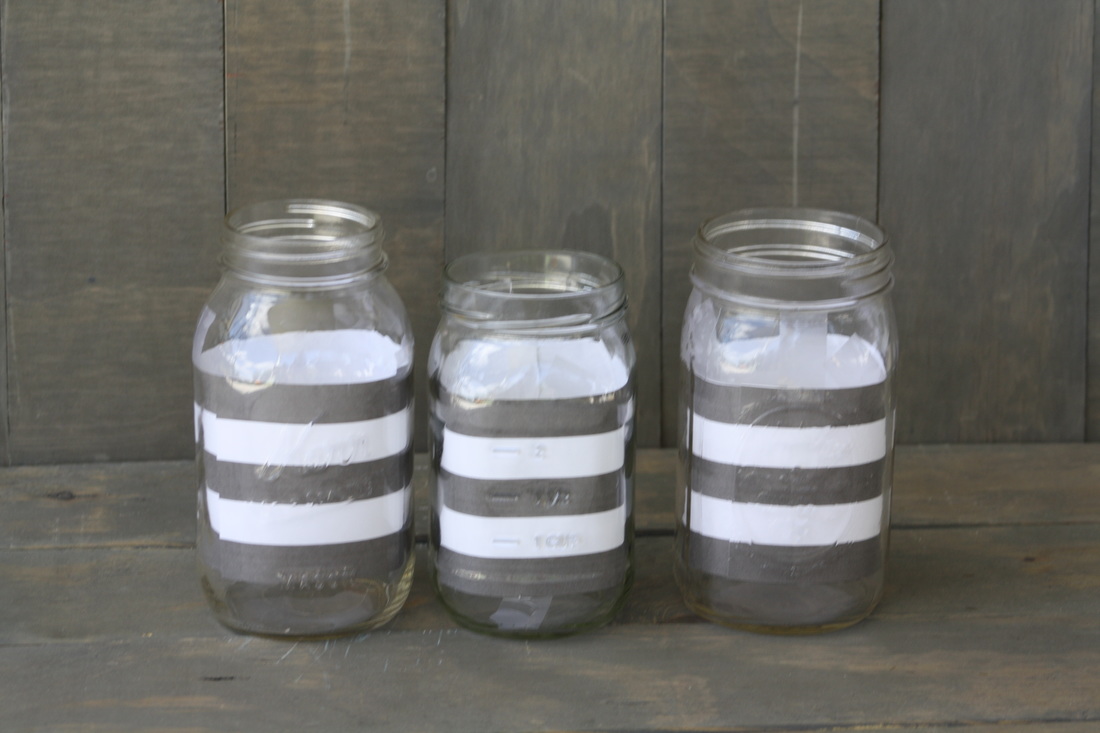
1. First thing to do is put the electrical tape where the red lines will be on jar 2 & 3. I ended up using a printed paper of stripes and taping it the the inside of the mason jar, that way all three jars would be even.
2. Then you will paint jar 1 blue and jar 2 & 3 white. Let this dry.
3. Next, you will remove the tape from jar 2 & 3 and paint the remaining stripes red.
4. Then add decorations that can go inside the jars :) I chose a flag and flowers.
3. Next, you will remove the tape from jar 2 & 3 and paint the remaining stripes red.
4. Then add decorations that can go inside the jars :) I chose a flag and flowers.

Sincerely, Jean
Easy DIY Diaper Basket
Spring is almost here and so is everyone's babies! I have attended several baby showers lately and I wanted to give a creative and affordable gift to everyone. I decided to do diaper baskets and it was so easy and fun!
Supplies (per basket):
Steps:
Step 1-Roll the diaper from the top down. Place rubber band in the middle. Repeat for all diapers.
Supplies (per basket):
- 15-20 diapers (depends on the size of your basket)
- basket
- several small rubber bands (enough for each diaper) and 1 large rubber band
- thick ribbon
- 4 head pins
- hot glue gun
- crinkled paper shreds
- gifts to fill the basket (books, onesies, socks, stuffed animals, bath soap, baby powder, baby clothes hangers, lotion, pacifiers, teething rings, bottles, wash clothes, wipes, etc.)
Steps:
Step 1-Roll the diaper from the top down. Place rubber band in the middle. Repeat for all diapers.
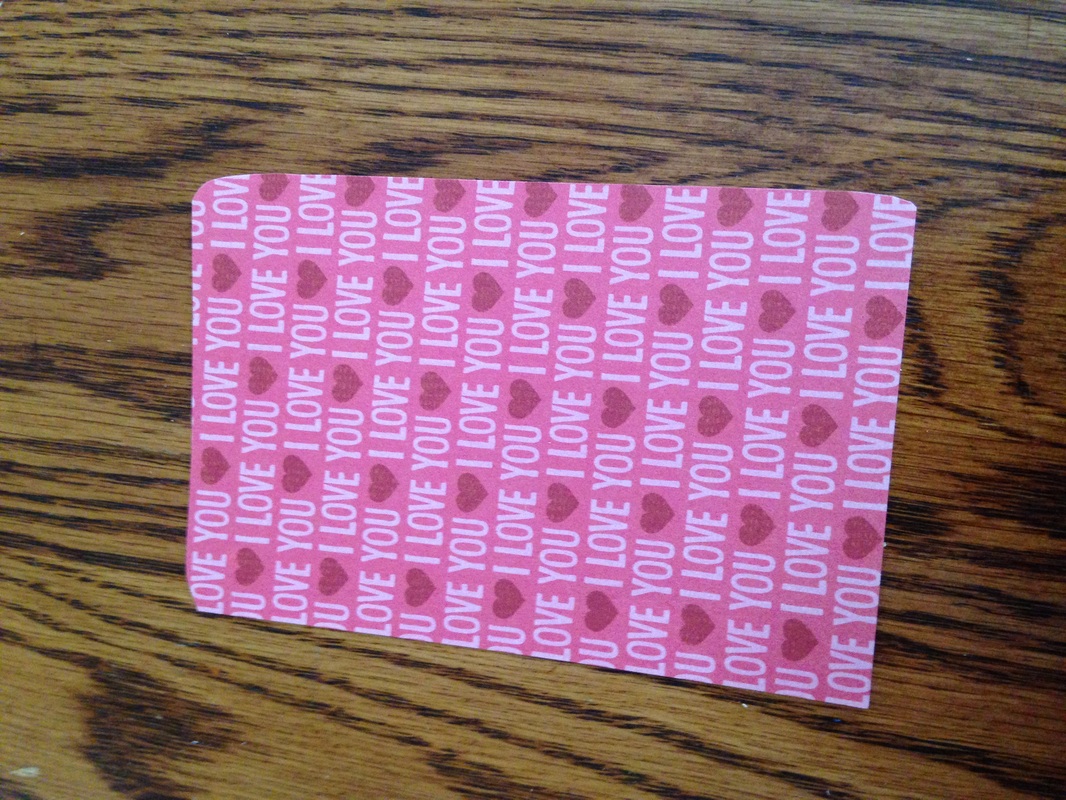
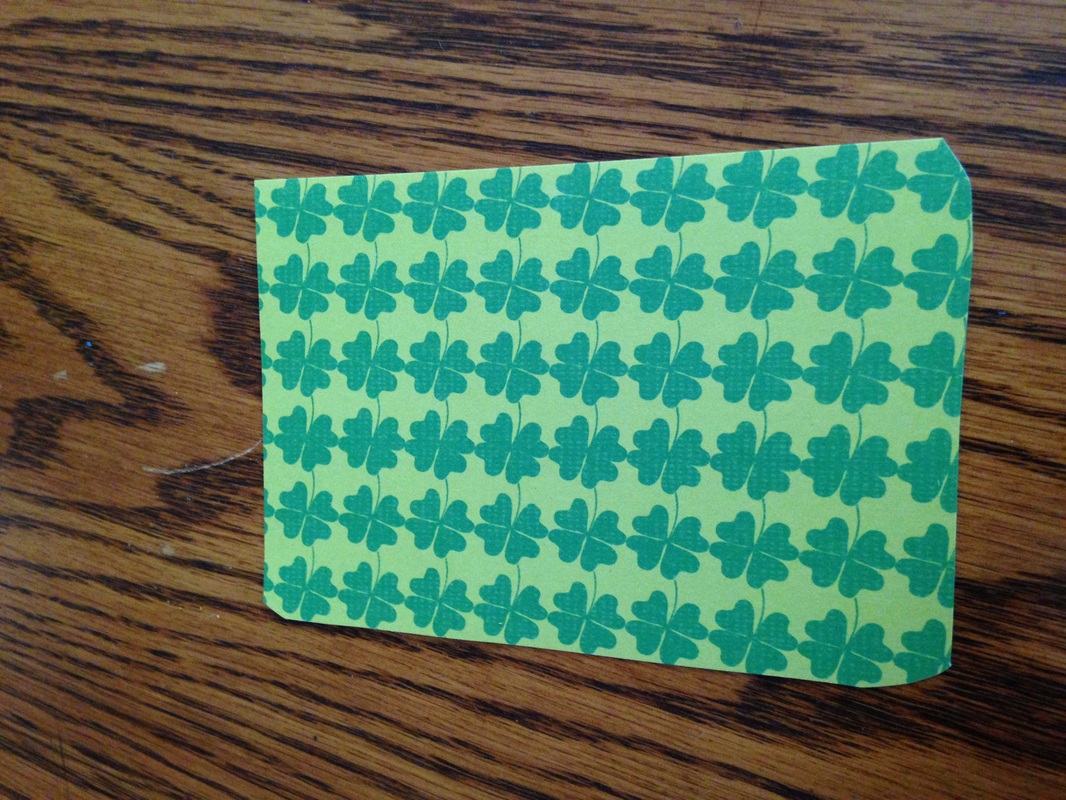
Lucky N' Love? Adorable reversible wood craft for Valentines & St.Patricks Day
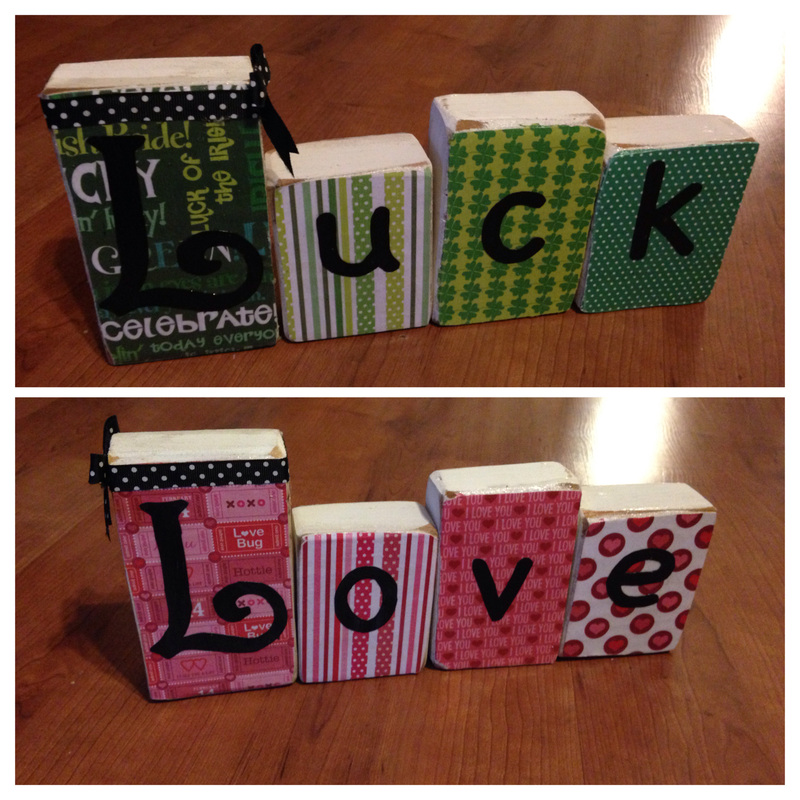
Why create just one holiday craft, when you can make two at the same time? You can showcase this adorable craft from Feb 1 - March 17 each year. Here's how to make it:
What you will need: Modpodge, 2 styrofoam paint brushes, white paint, 8 pieces of cardstock/decorative paper, scissors, regular paper, printer, sander/sandpaper, pencil
Optional: hot glue gun, ribbon
1. Cut your wood. You can either purchase pre-cut wood blocks, or (if you have a saw and a sander) you can cut/sand your own.
I chose to cut four pieces of wood in these sizes (l,w,h)
1. 3" x 1.5" x 5.5" (for letters L,L)
2. 3" x 1.5" x 4" (for letters O,U)
3. 3" x 1.5" x 4.5" (for letters V,C)
4. 3" x 1.5" x 4" (for letters E,K)
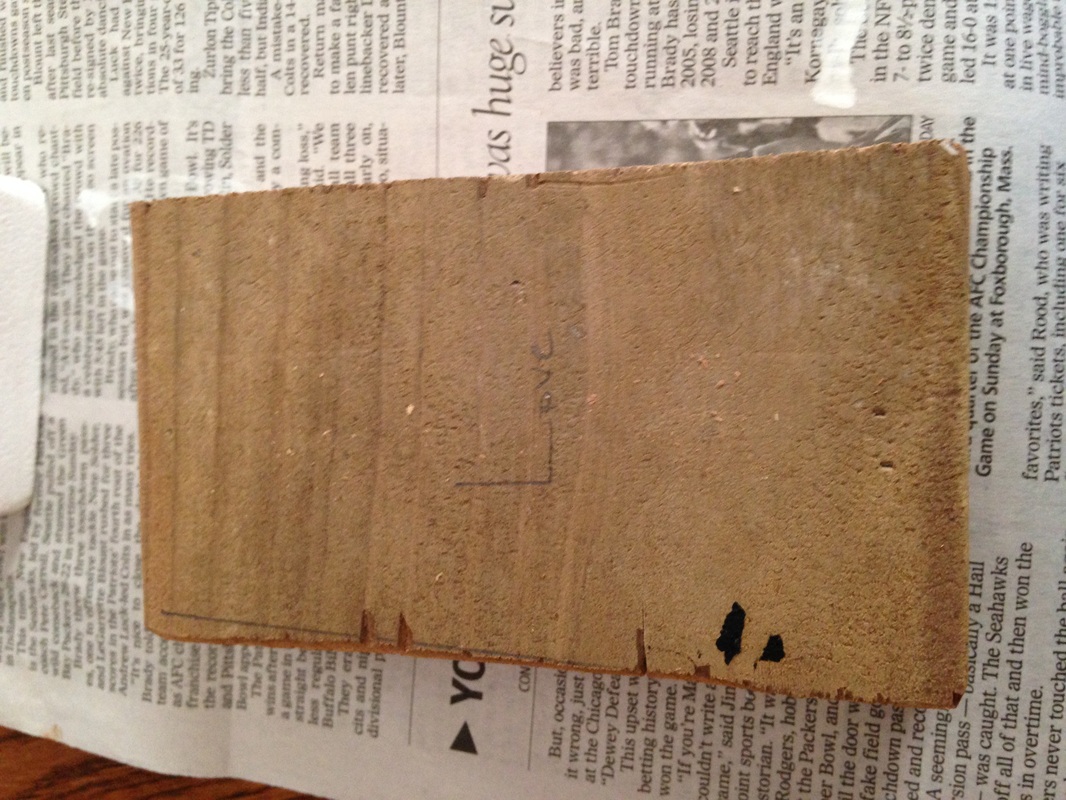
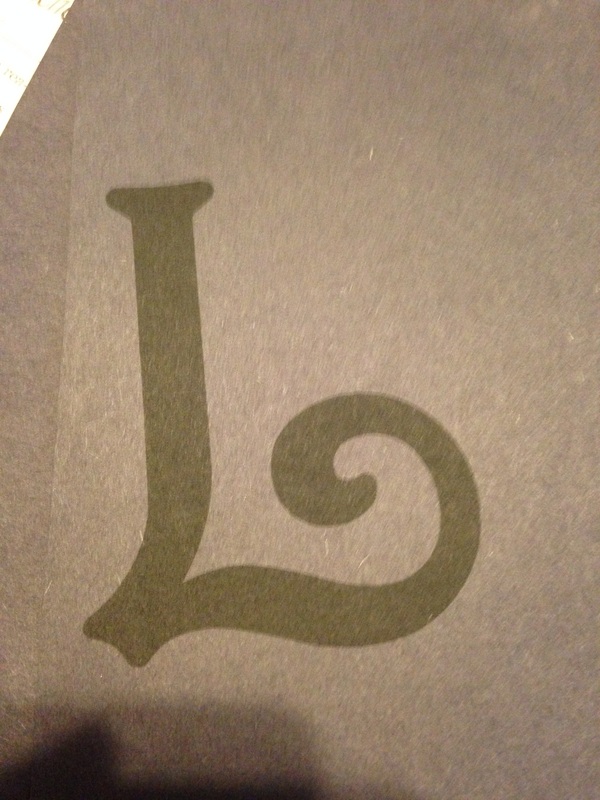
2. With your pencil, write out the letters of LOVE and LUCK on the corresponding blocks/sides. This will help you to remember what goes where and which side is top/bottom.
What you will need: Modpodge, 2 styrofoam paint brushes, white paint, 8 pieces of cardstock/decorative paper, scissors, regular paper, printer, sander/sandpaper, pencil
Optional: hot glue gun, ribbon
1. Cut your wood. You can either purchase pre-cut wood blocks, or (if you have a saw and a sander) you can cut/sand your own.
I chose to cut four pieces of wood in these sizes (l,w,h)
1. 3" x 1.5" x 5.5" (for letters L,L)
2. 3" x 1.5" x 4" (for letters O,U)
3. 3" x 1.5" x 4.5" (for letters V,C)
4. 3" x 1.5" x 4" (for letters E,K)
2. With your pencil, write out the letters of LOVE and LUCK on the corresponding blocks/sides. This will help you to remember what goes where and which side is top/bottom.
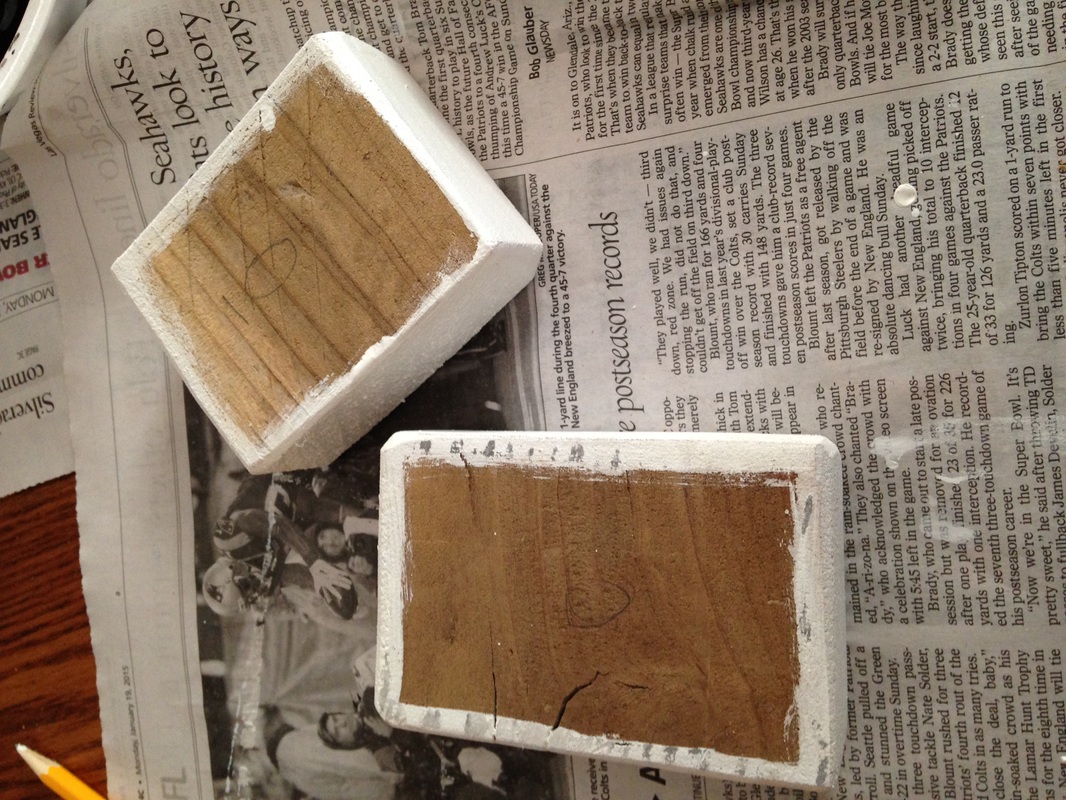
3. With one of your paint brushes, paint the sides (width) with white paint (or any other color you prefer). I made sure to paint a little extra over the side. Let dry
4. Outline the shape of your block with a pencil onto the back of your cardstock paper. That way it will be the perfect fit. Cut out that shape on your cardstock with scissors. Apply modgepodge to the wood where the paper will be adhered. With your other paintbrush, smooth out the modgepodge. Apply paper and make sure that there are no air bubbles - you can even use a roller/kitchen spatula for this part. Let dry
(Note: Please read step 6 for additional lettering options before beginning step 4)
(Note: Please read step 6 for additional lettering options before beginning step 4)

5. Once your have the paper adhered to both sides of the wood block and they are dry, use a sander or sandpaper to "rough up" the edges to your liking.
6. Print out the letters LOVE LUCK onto paper and cut. (You can also just print the letters out directly onto the cardstock/decorative paper, depending on what type of look you like best. That would also be a little easier). Apply a smooth coat of modgepodge onto the paper/wood block and then adhere the letters.
6. Print out the letters LOVE LUCK onto paper and cut. (You can also just print the letters out directly onto the cardstock/decorative paper, depending on what type of look you like best. That would also be a little easier). Apply a smooth coat of modgepodge onto the paper/wood block and then adhere the letters.
7. After everything is dry, cover your entire craft with modgepodge (modgepodge acts as a glue, sealer, and a finish)
8. Optional: hot glue a ribbon to your first wood block and tie a bow
Sincerely,
Jean
8. Optional: hot glue a ribbon to your first wood block and tie a bow
Sincerely,
Jean
